
Why Proper TPMS Installation Matters on the ENCLAVE
The Buick Enclave is a heavy, three-row SUV that relies on accurate tire pressure data for stability control, fuel economy, and tire longevity. A poorly installed TPMS sensor—whether overtightened, undertightened, or fitted with a worn valve stem—will cause slow leaks, intermittent warning lights, or complete sensor failure. Since the Enclave uses a clamp-in style sensor (metal stem, nut-secured), the margin for error is thin. One stripped thread or cracked seal and you’re pulling the tire again.
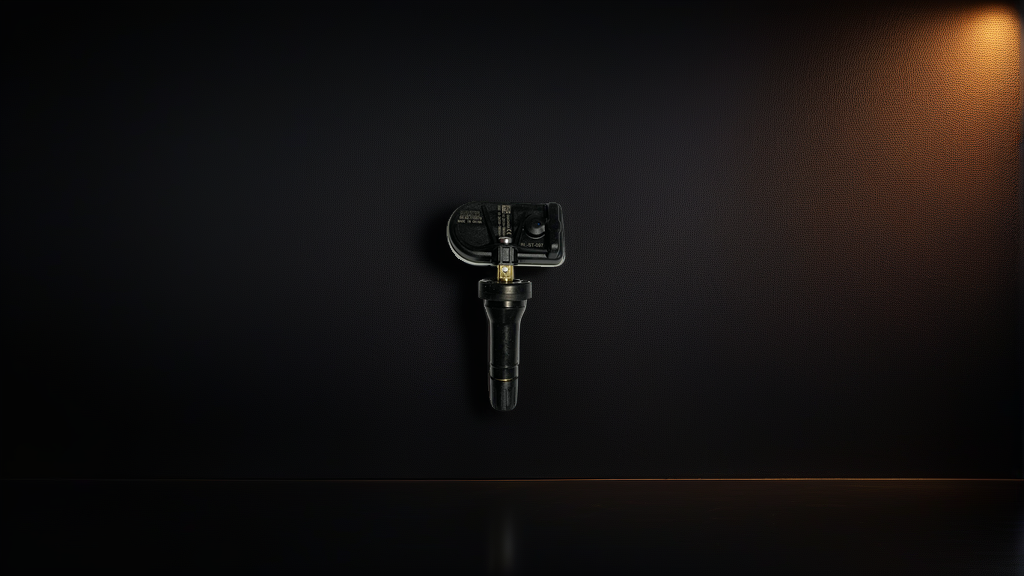
The BH-Sens BL-ST-097 sensor, sourced from Baolong Technology and sold through risensauto.com, is pre-programmed and ready to pair. But even the best sensor fails if the installation is rushed.
Tools You’ll Need
Before you start, gather:
- Torque wrench (inch-pound range, 30–100 in-lbs)
- 11mm deep socket (for the clamp-in nut)
- Valve core tool
- New valve stem seal kit (grommet, washer, nut)
- Tire lubricant (soapy water or dedicated bead lube)
- Tire changer or manual spoons (professional mount recommended)
Do not reuse old seals. The Enclave’s factory sensors often have hardened rubber after 5–7 years. A new seal kit costs under $5 and prevents a comeback.
Installation Torque Specs for Enclave TPMS Sensors
The most common mistake is guessing the torque. Here’s the spec that applies to the BL-ST-097 and most clamp-in sensors on the Enclave:
| Component | Recommended Torque | Notes |
|---|---|---|
| Clamp-in retaining nut | 62–71 in-lbs (7–8 Nm) | Do not exceed 80 in-lbs |
| Valve stem core | Hand-tight + ¼ turn | Use valve core tool, no wrench |
| Sensor-to-wheel fitment | N/A (sensor sits in valve hole) | Ensure flat seating |
Why torque matters: The aluminum valve stem on the BH-Sens sensor is softer than steel. Torque it to 90 in-lbs and you risk cracking the stem or distorting the sealing surface. Torque it to 40 in-lbs and the nut backs off, causing a slow leak. The 62–71 in-lbs range is tight enough to compress the rubber grommet into the wheel hole, creating a seal, but light enough to avoid damage.
Check your Enclave’s model year. 2008–2012 models use a 10mm thread nut; 2013–2017 models use the same 11mm nut as most GM platforms. The BL-ST-097 fits both, but always verify the nut size before torquing. If the nut feels loose at 62 in-lbs, stop—the thread pitch may differ.
Valve Stem Service: Don’t Skip This Step
The valve stem assembly includes the sensor body, the rubber grommet, a metal washer, and the retaining nut. Here’s the correct order:
- Remove the old sensor by unscrewing the nut from inside the wheel well (tire must be off).
- Clean the wheel hole with a wire brush or rag. Remove corrosion, old rubber residue, and dirt.
- Install the new grommet onto the sensor stem from the inside of the wheel. The grommet should be flush against the sensor body.
- Slide the stem through the wheel hole from the inside out.
- Place the metal washer over the stem on the outside of the wheel.
- Thread the retaining nut onto the stem by hand until snug. Do not cross-thread.
- Torque to spec using an 11mm deep socket and inch-pound torque wrench.
Valve core service: Always replace the valve core (the Schrader valve inside the stem) when installing a new sensor. The BL-ST-097 comes with a new core in the package. Install it using a valve core tool, hand-tight plus ¼ turn. Overtightening the core can crack the brass seat and cause a fast leak that only appears after the tire is inflated.
Common Installation Mistakes (And How to Avoid Them)
Mistake 1: Overtightening the Retaining Nut
This is the #1 cause of sensor failure on the Enclave. Mechanics who are used to tightening lug nuts to 100 ft-lbs often apply the same force to a TPMS nut. Result: a cracked stem, stripped threads, or a deformed grommet that won’t seal.
Fix: Use a dedicated inch-pound torque wrench. Mark the socket with a piece of tape at 65 in-lbs. If you don’t have a torque wrench, tighten by hand until the nut is snug, then add a 1/8 turn with the socket. This is less precise but safer than over-torquing.
Mistake 2: Using the Wrong Seal Kit
The Enclave’s wheel hole has a specific chamfer angle. Some aftermarket seal kits use a grommet that’s too thick or too thin. The BH-Sens BL-ST-097 ships with a GM-spec grommet, but if you’re sourcing a separate kit, ensure it’s designed for 433MHz clamp-in sensors (not rubber snap-in types).
Fix: Always use the seal kit that comes with the sensor. If lost, order a “GM clamp-in TPMS seal kit” (usually includes grommet, washer, nut). Avoid universal kits that claim to fit all brands.
Mistake 3: Mounting the Tire Incorrectly
When mounting the tire onto the wheel, the tire bead can slide over the sensor stem if the stem is not protected. This shears the stem flush with the wheel, destroying the sensor.
Fix: Before mounting, position the sensor stem at the 12 o’clock position (top of the wheel). This keeps it out of the bead path during mounting. Use a tire bead lubricant generously. If the tire machine has a “TPMS guard,” use it—it’s a plastic shield that prevents the bead from hitting the stem.
Mistake 4: Not Programming the Sensor
The BL-ST-097 is pre-programmed with an ID that matches GM’s 433MHz protocol, but it must still be “learned” by the Enclave’s TPMS module. Some installers assume pre-programmed means plug-and-play.
Fix: After installation, drive the Enclave above 15 mph for 10 minutes, or use a TPMS activation tool to trigger each sensor. The Enclave’s TPMS system learns sensors in a specific order (LF, RF, RR, LR). Without learning, the dash light stays on.
Mistake 5: Ignoring the Valve Stem Cap
The Enclave uses a standard plastic or metal cap on the valve stem. If the cap is missing, dirt and moisture enter the core, causing corrosion and eventual leak.
Fix: Always install a new cap (included with the sensor). Use a metal cap if the vehicle is in a salt-belt region—plastic caps crack in cold weather.
Fitment Note: Which Enclave Years Use the BL-ST-097?
The BH-Sens BL-ST-097 covers the following Buick Enclave model years and compatible GM vehicles:
| Vehicle | Years | OE Cross-Reference |
|---|---|---|
| Buick Enclave | 2008–2017 | 13530661, 13533166, 13538565 |
| Cadillac SRX | 2010–2016 | 13538566 |
| Chevrolet Traverse | 2009–2017 | 13538761 |
| GMC Acadia | 2007–2016 | 13549707 |
Always verify your Enclave’s build date. 2008 models built before May 2008 may use a different frequency (315MHz). The BL-ST-097 is 433MHz, which is standard for 2008.5–2017 Enclaves.
Recommended Part
For a reliable, drop-in replacement on your Enclave, use the BL-ST-097 | BH-Sens 433MHz TPMS Tire Pressure Sensor | Fits Buick, Cadillac, Chevrolet, Nevo | OE# 13530661, 13533166, 13538565. It comes pre-programmed with a GM-compatible ID, includes a new seal kit and valve core, and is tested to OE specifications. No cloning or reprogramming required—just install, learn, and drive.
FAQ
Do I need to replace all four sensors at once on my Enclave?
Not necessarily. But if one sensor has failed, the others are likely near the end of their battery life (typically 5–7 years for BH-Sens sensors). Replacing all four at once saves labor costs and prevents future warning lights. If you replace only one, ensure the new sensor matches the frequency (433MHz) and protocol of the remaining three.
Can I use a rubber snap-in TPMS sensor on my Enclave instead of clamp-in?
No. The Enclave uses clamp-in sensors with a metal stem and retaining nut. Rubber snap-in sensors (often used in Honda/Toyota) do not fit the wheel hole design and will leak immediately. The BL-ST-097 is a clamp-in type, correct for GM wheels.
Why does my TPMS light stay on after installing the BL-ST-097?
The sensor must be “learned” by the vehicle’s TPMS module. Drive above 15 mph for 10–15 minutes. If the light remains, use a TPMS activation tool (such as the Autel TS508 or ATEQ VT56) to trigger each sensor in the correct order: Left Front, Right Front, Right Rear, Left Rear. If the tool cannot activate the sensor, check the installation torque and ensure the nut is not over-tightened (which can break the internal antenna).
What torque should I use for the valve stem nut if I lost the spec?
Use 65 in-lbs (approximately 7.3 Nm) as a safe middle point. If using a beam-style torque wrench, set it to 65 in-lbs. If you don’t have a torque wrench, tighten the nut by hand until snug, then use a socket to turn an additional 90 degrees (¼ turn). This is approximate but safer than guessing.